
Connect your apps and reply your reviews
In order to complete all steps of synchronizing Google Reviews integration, you must be the owner of the console.
Currently we only support replies to comments within the last 7 days
1. Personal Center -- My connections
Click Reply to Reviews and Reviews in Google Play.

2. Fill in the correct information
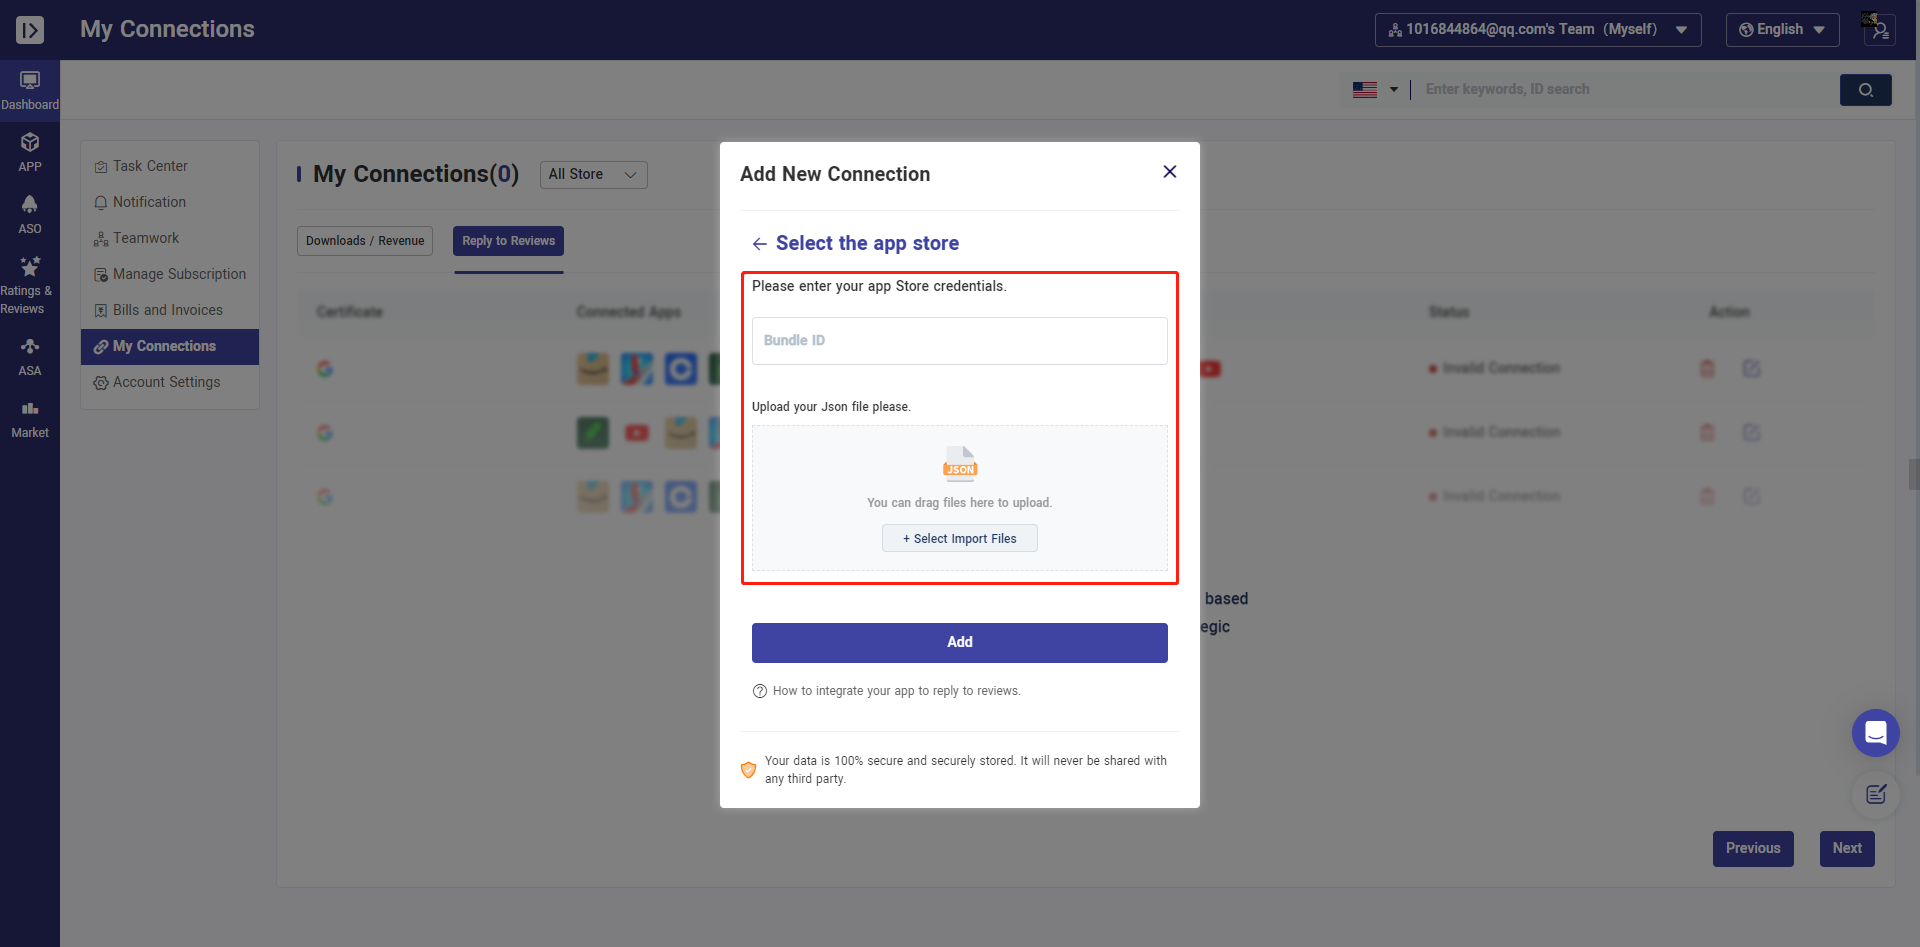
Fill in the name of the application you want to connect
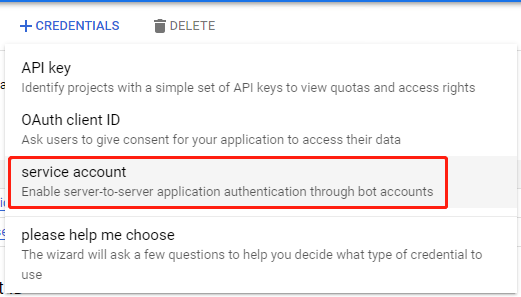
Get the correct JSON file
3. Find the Correct JSON File
In order to get the JSON file, you must perform the following steps and grant different permissions to access this feature:
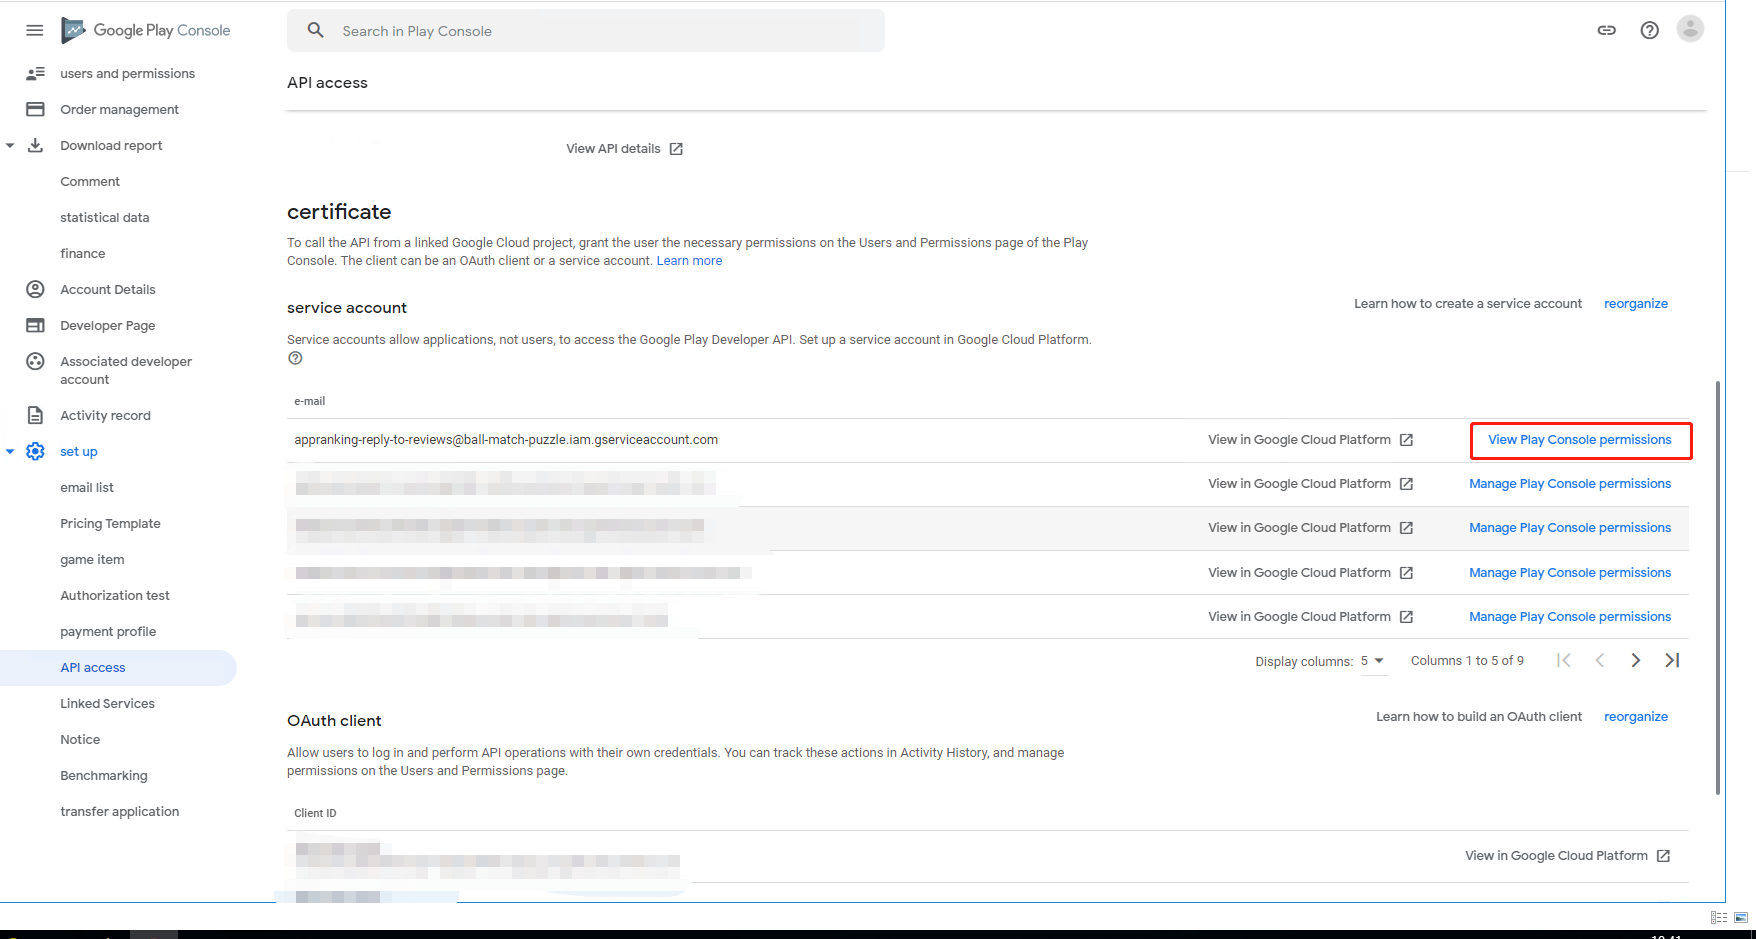
a) For this part, you need to go to your google play console in the Settings > Developer Account > API Access.
To access this section, you need to be the account owner! Otherwise, you will not be able to access it.
After entering, you need to create a new service account to integrate.
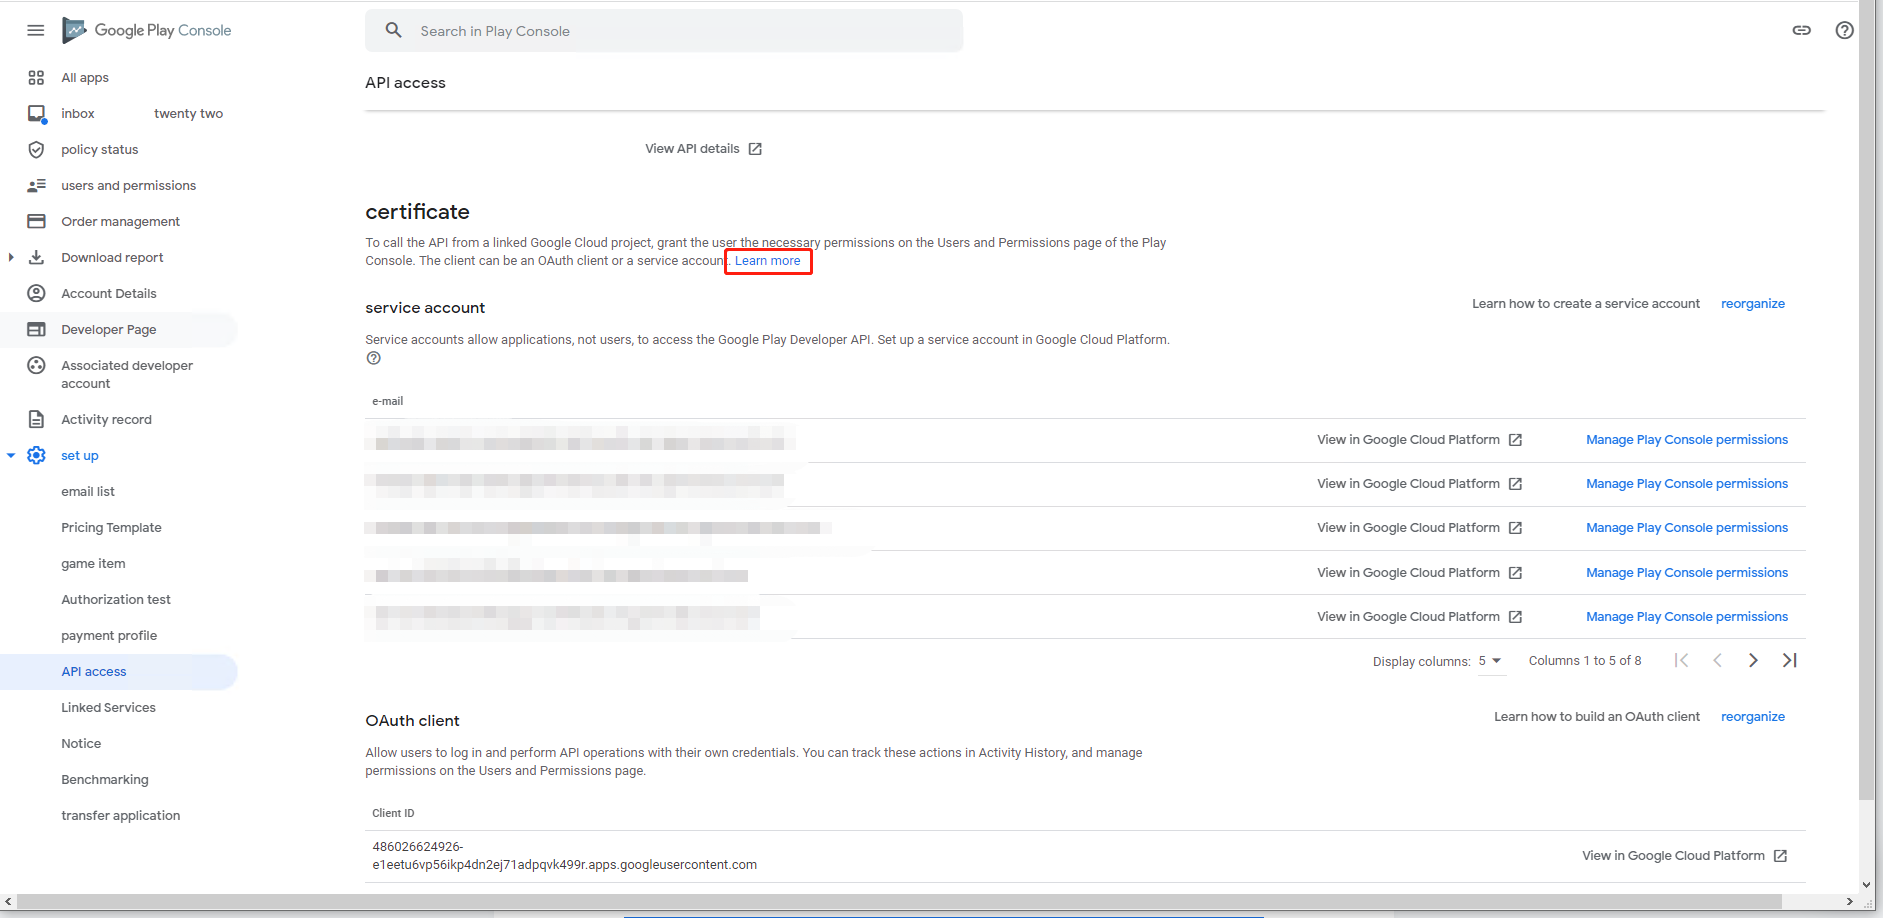
When you use Google Cloud Platform (Be careful: you still need to use your google account with the console, otherwise you will not be able to continue). You need to select the Google Play Console Developer Program.
In this item, you will be able to click on Create Service Account. This service account is important in that it allows us to notify your console when you reply to a comment in our tool.
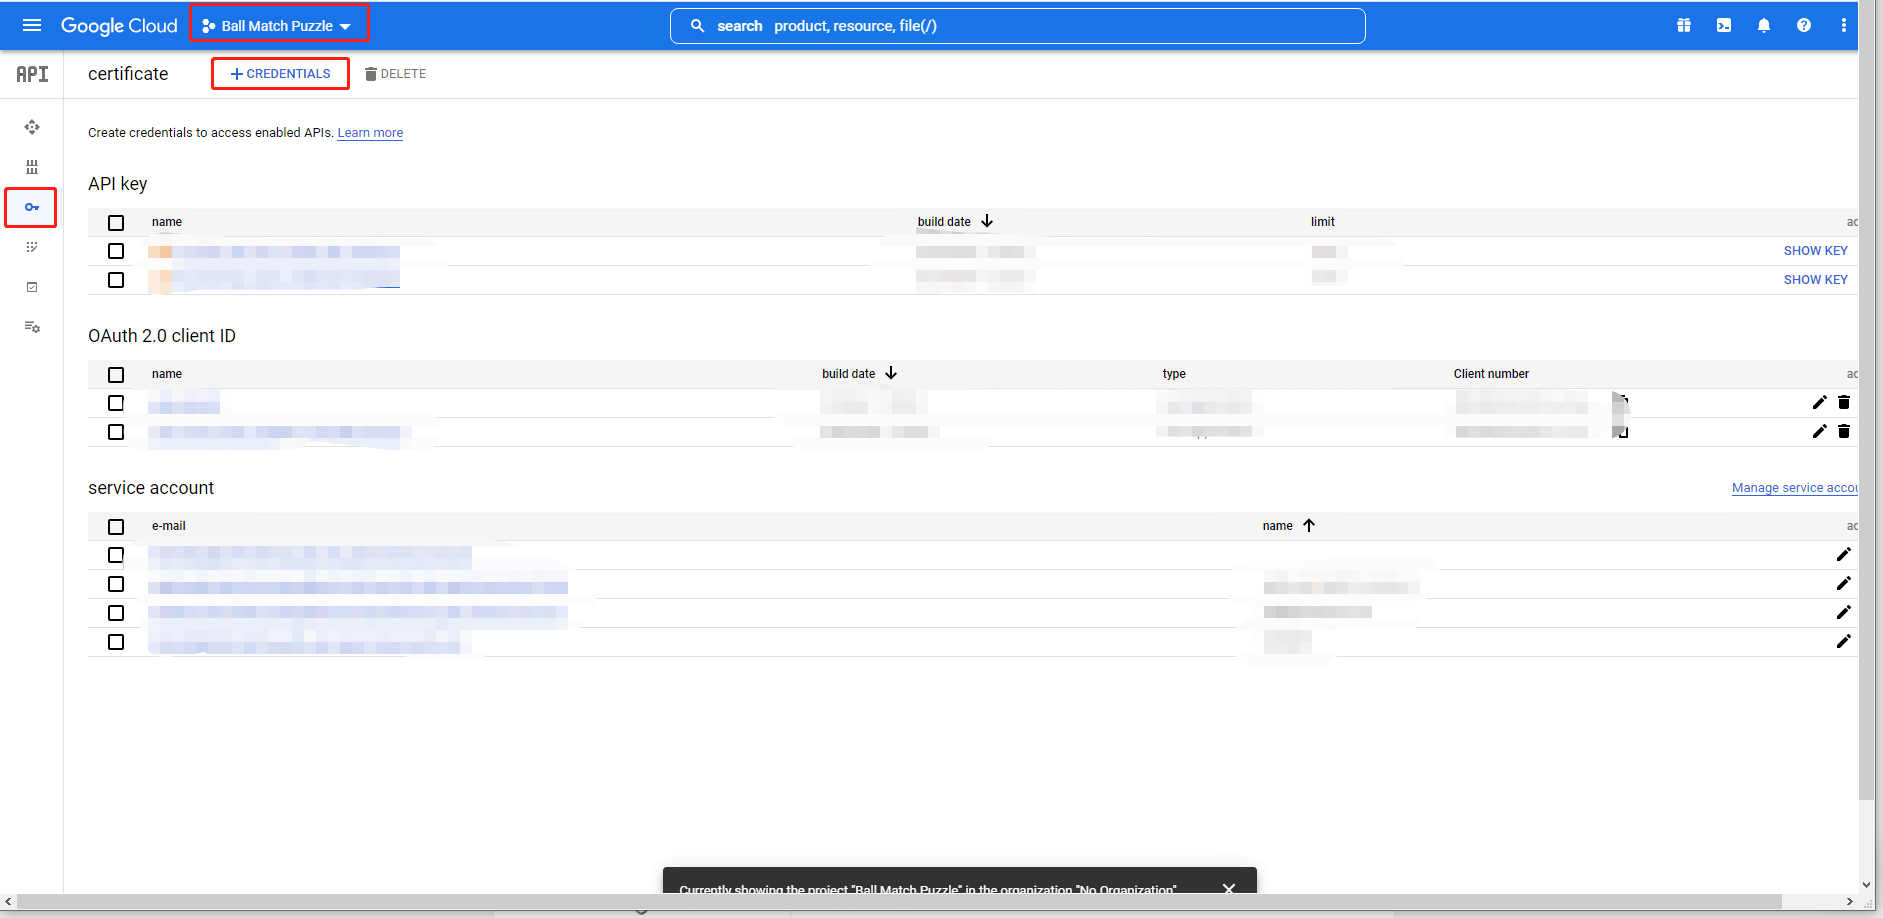
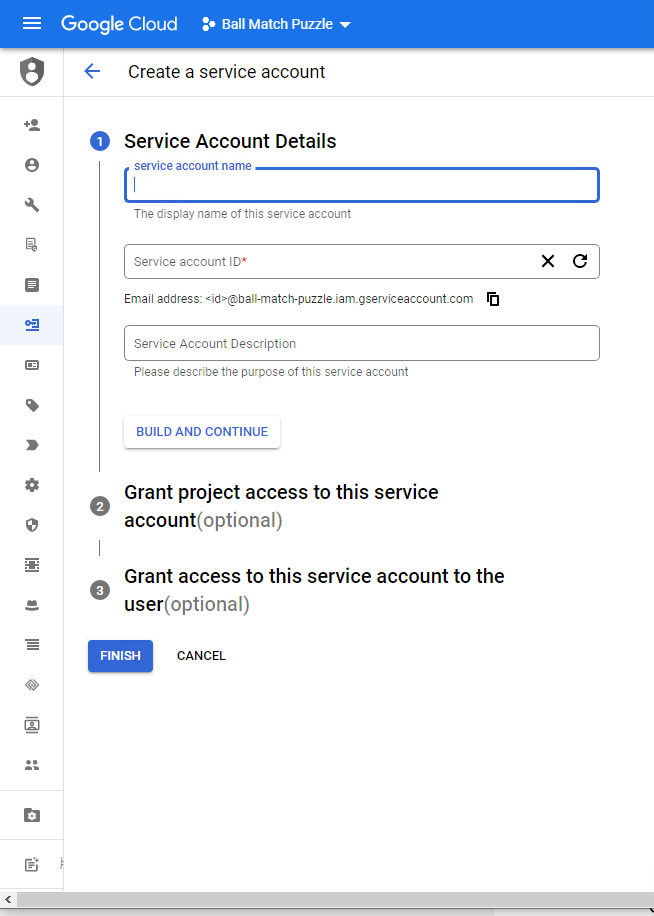
Create your service account.
When creating a new service account, you can call it whatever you want, but you'd better to find a name that is relevant to its purpose, such as "Appranking-reply-to-reviews". You can also add a description to explain the purpose of creating this service account, but this is optional.
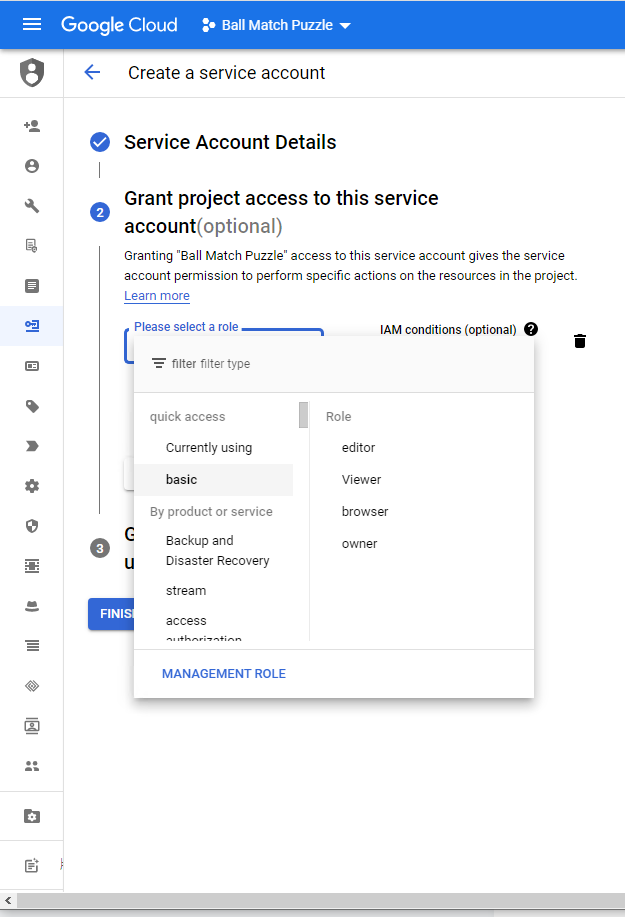
After completing the first step, you need to grant this service account access to the project so that it has the right to perform specific actions on the resources in the project. To do this, you must select the "Basic-Viewer" role in the "Viewer" mode.
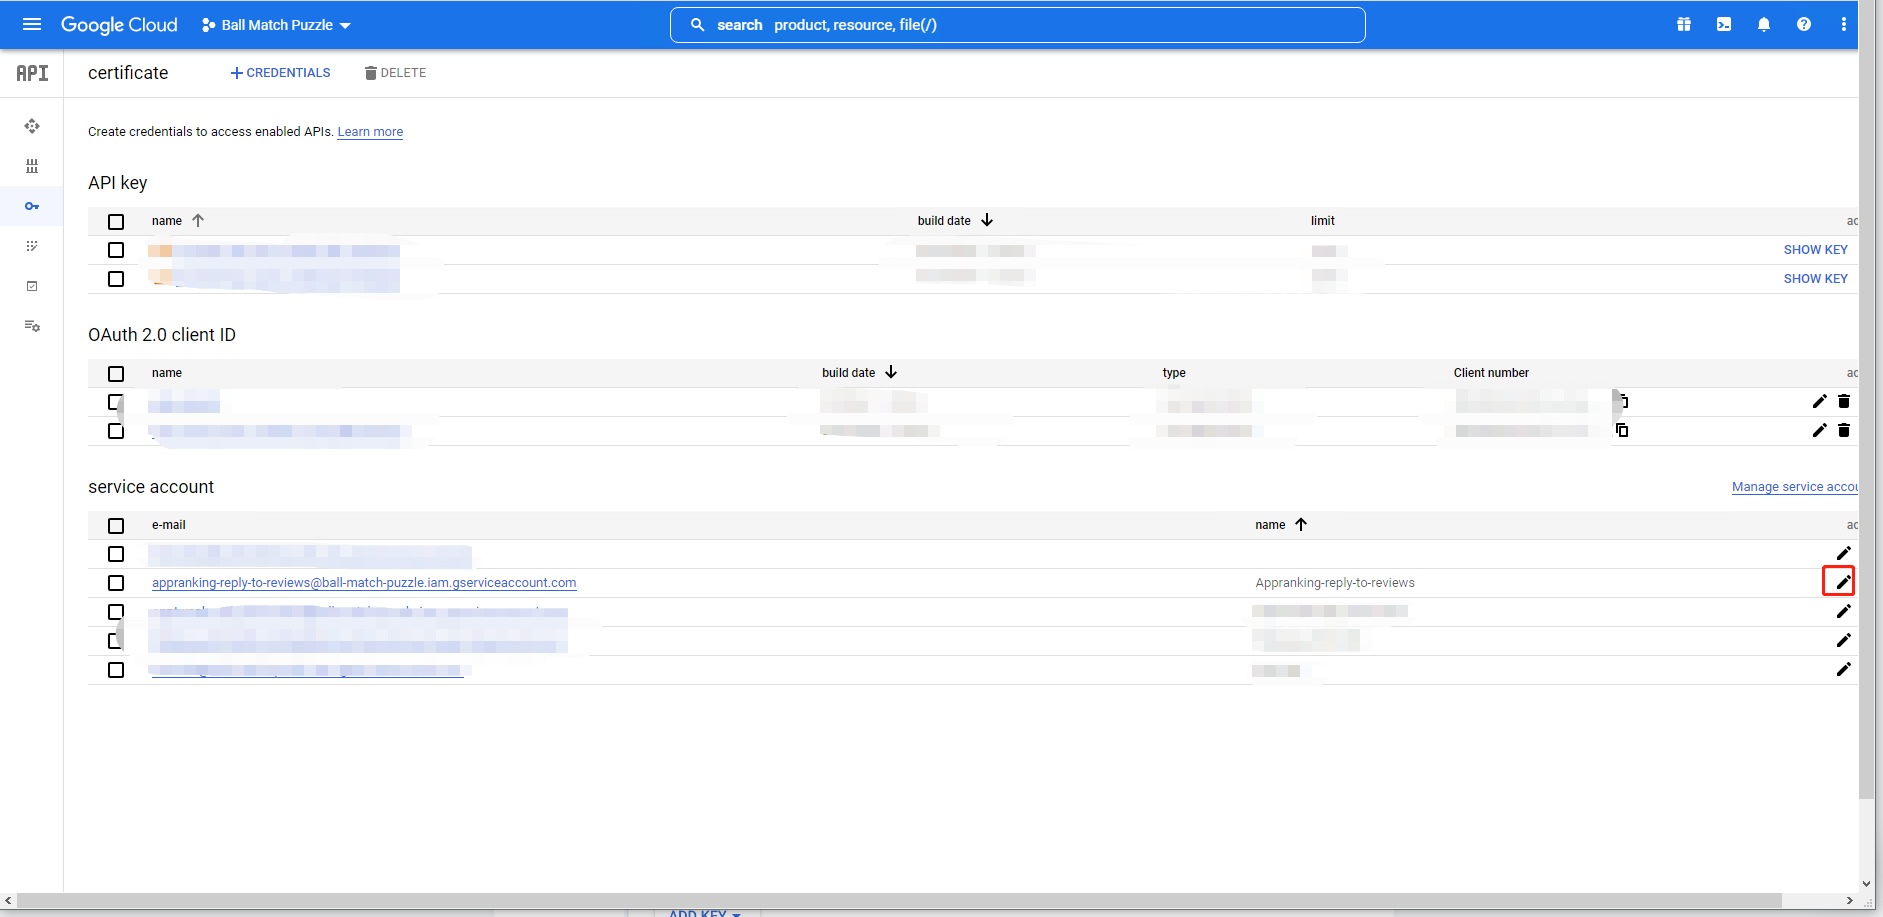
b) Create a new service account and get your JSON file
After creating your service account, you need to add a "key" to it. With this step, you will allow Appranking to access your service account and it will create the JSON file that you must upload in our website.
First, you need to click on the three dots of the service you just created an account for, then click on "Manage Keys".
In Manage Keys, you can download JSON files by clicking ADD KEY > Create new key
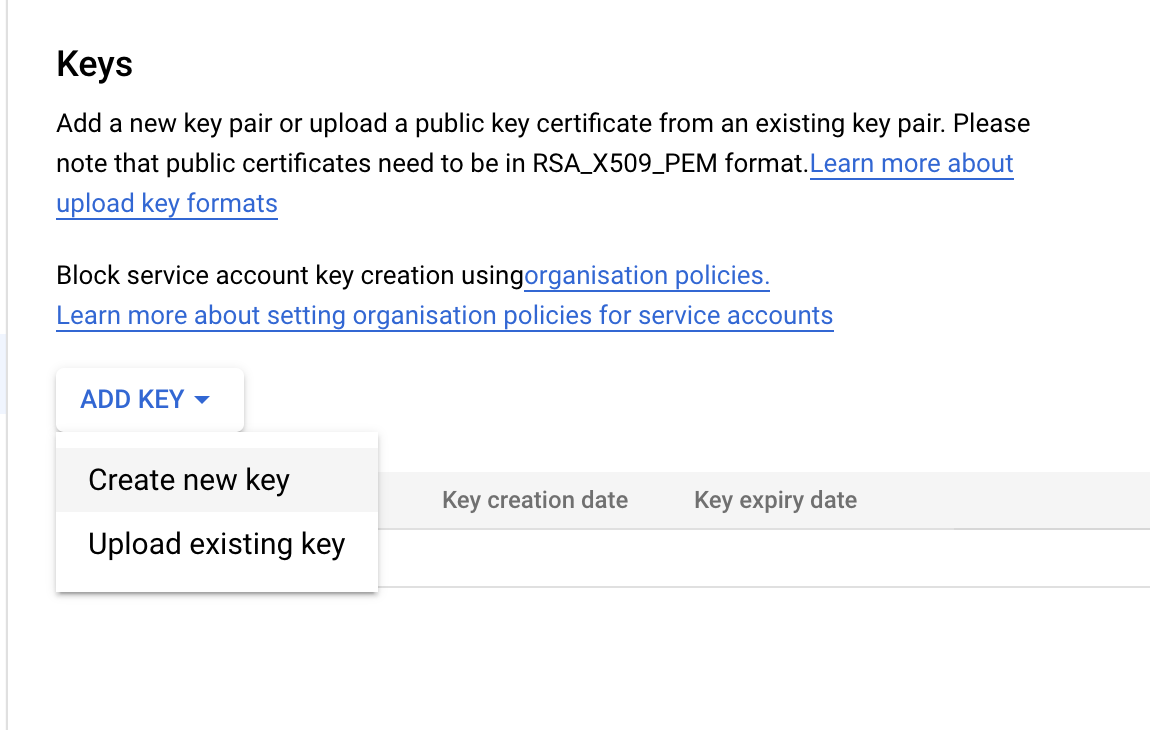
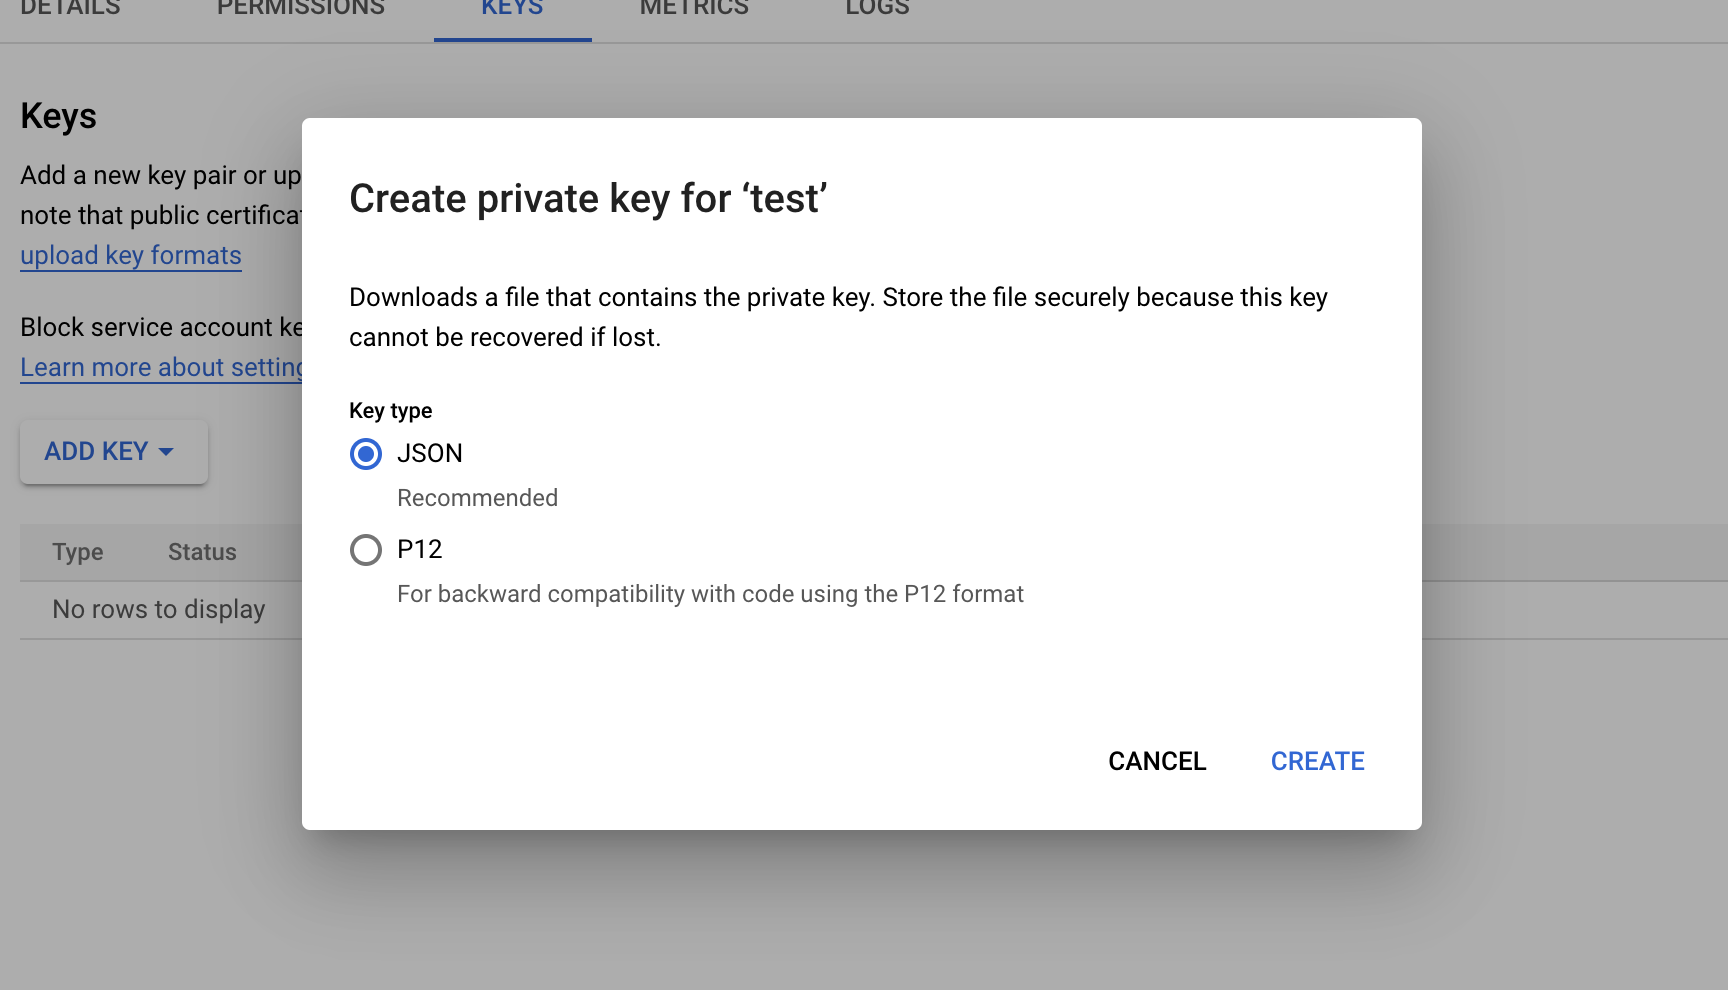
You will see this pop-up window asking you which type of key you need. You need to select the JSON option.
After downloading the JSON file, you can save it for the final step of this integration. First, Appranking will need you to update this service account to grant access to reply to comments.
4. Grant the correct permissions
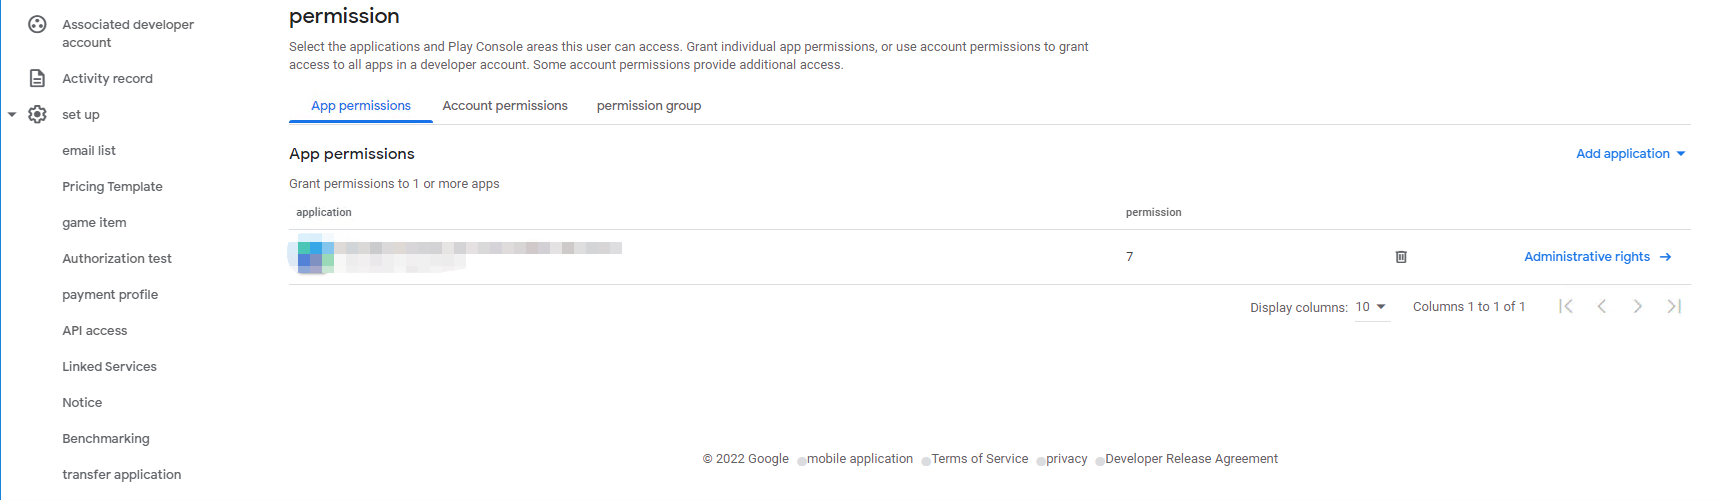
Return to your console and refresh your service account to view the new account.
Select the correct service account and click on Grant access.
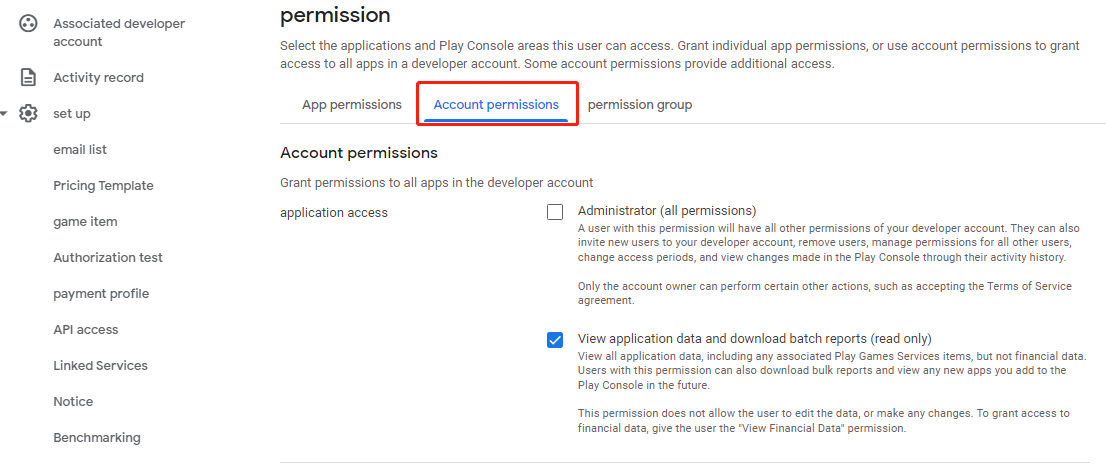
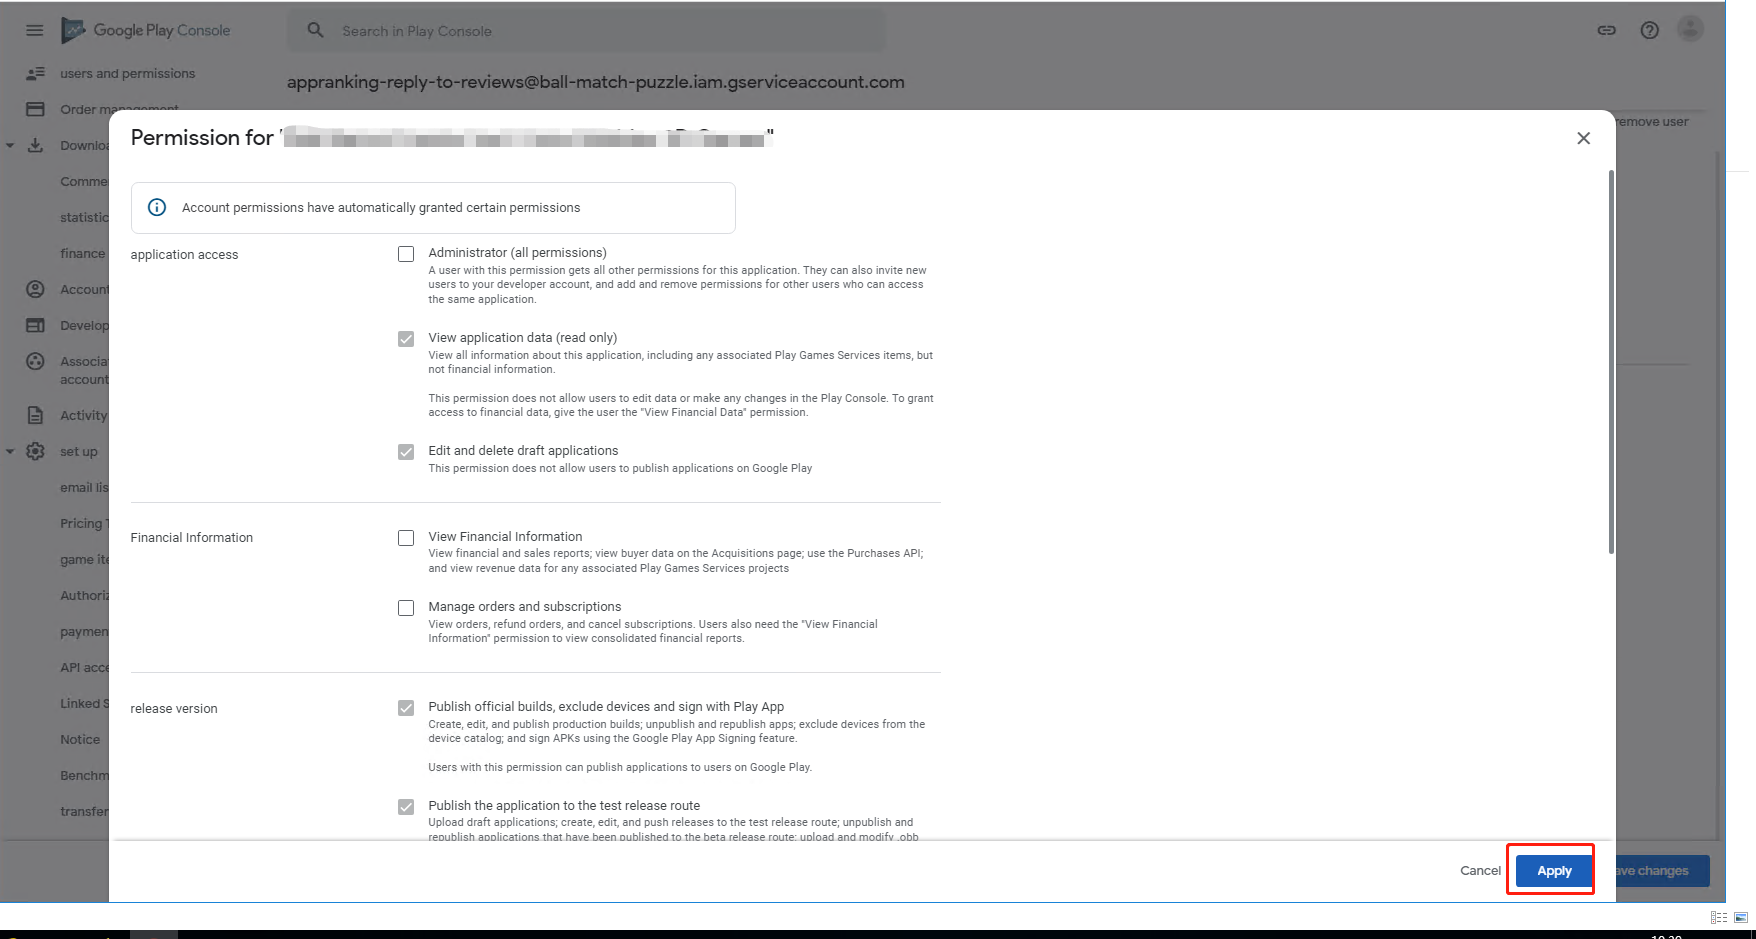
Then you will open the Permissions where you can select the correct permissions to allow you to reply directly on Appranking.
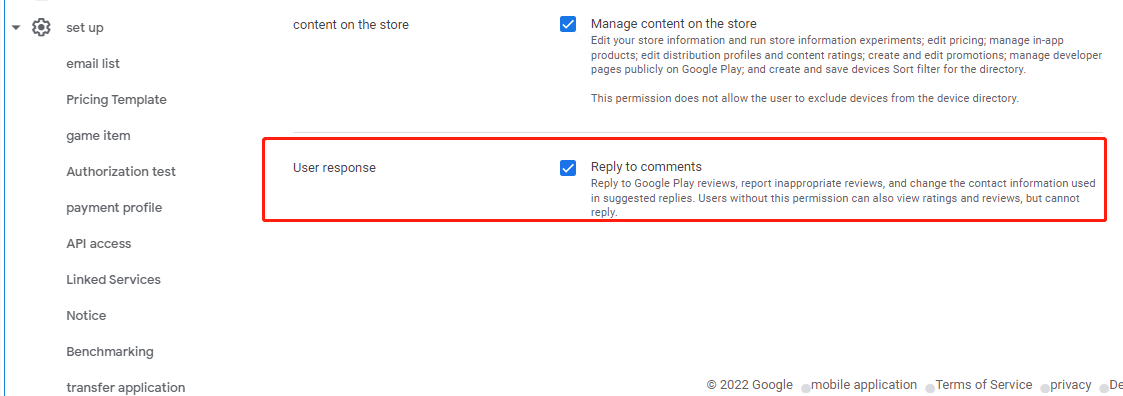
The first option you must choose is View application data and download batch reports (read-only) so that Appranking can see which applications are involved in this service account.
The second option you must select is Reply to Comments. It will allow you to reply to comments using this service account.
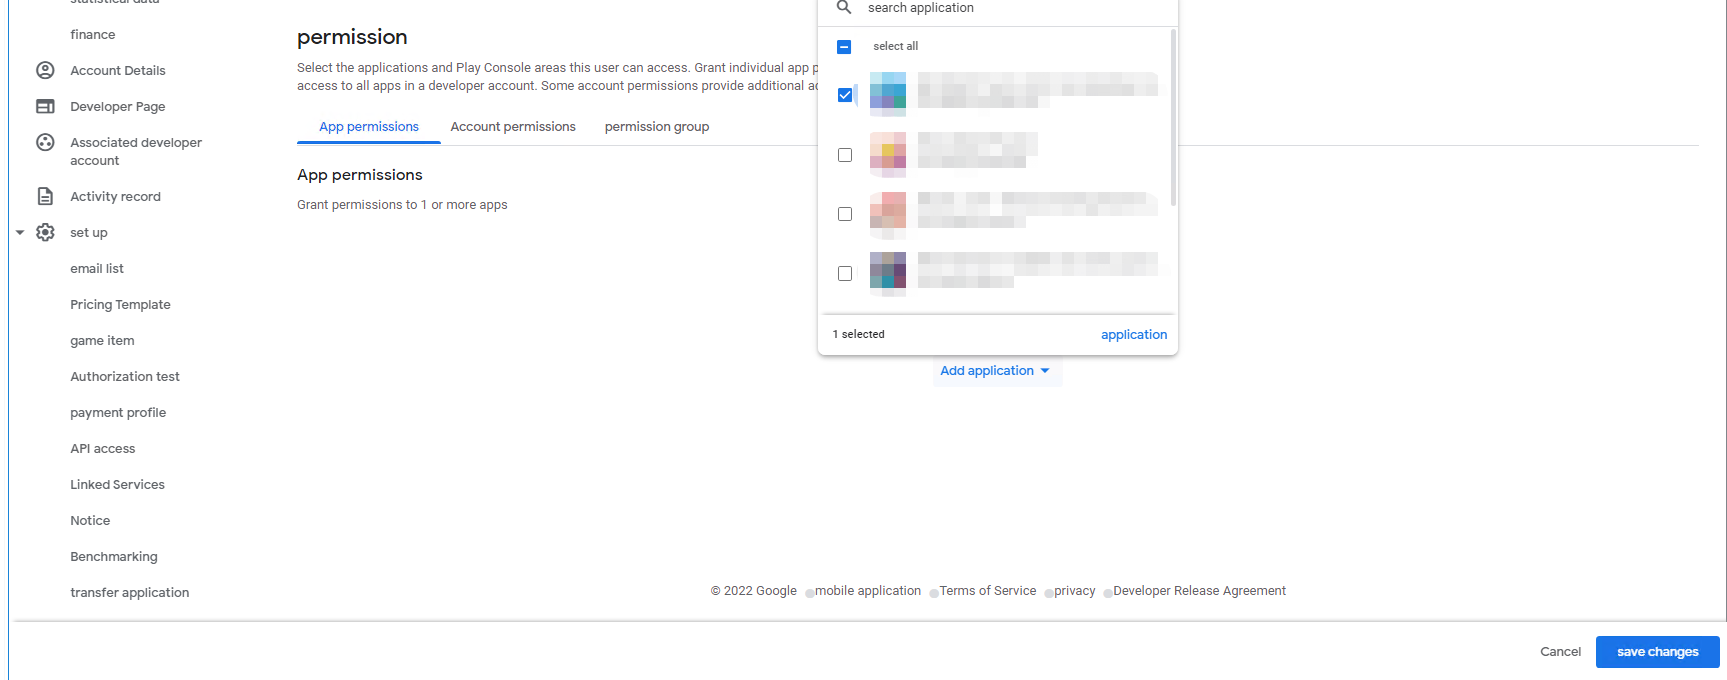
Again, you must configure the application permissions, which are usually done by default, but you must add the application.
5. Upload your JSON file
After completing all above steps, you can upload the JSON file that you downloaded earlier in our integration schema.

Once you've completed this step, you can use the apps you've integrated and start replying to comments! Don't forget to follow the apps!
Appranking's Privacy Policy
Be 100% confident that your credentials are encrypted and stored securely. We do not share your console information and data with any third parties.
Empower your team with our App Marketing Intelligence
Free forever. Cancel anytime.